Jira Checklists are a great way to ensure compliance. They do double duty, ensuring that no critical steps are overlooked, and covering your ass by having someone check that they’ve completed each of those steps. Whether you want to lock down your organization’s prescribed software development life cycle, or need to meet requirements in a highly-regulated industry, checklists have your back.
To make extra sure nothing slips through the cracks, you can set a Jira workflow validator that will prevent the work item from being transitioned unless the checklist is complete.
Setting a Jira Checklist Validator in Company-managed Spaces
This validation rule blocks a transition unless all items, including items on both local and Global Checklists are complete, giving you 100% compliance.
To set the validation rule:
1. Navigate to Space settings > Workflows and click on Edit workflow.
2. Select the transition where you want to add the rule and click on the Rules + sign.
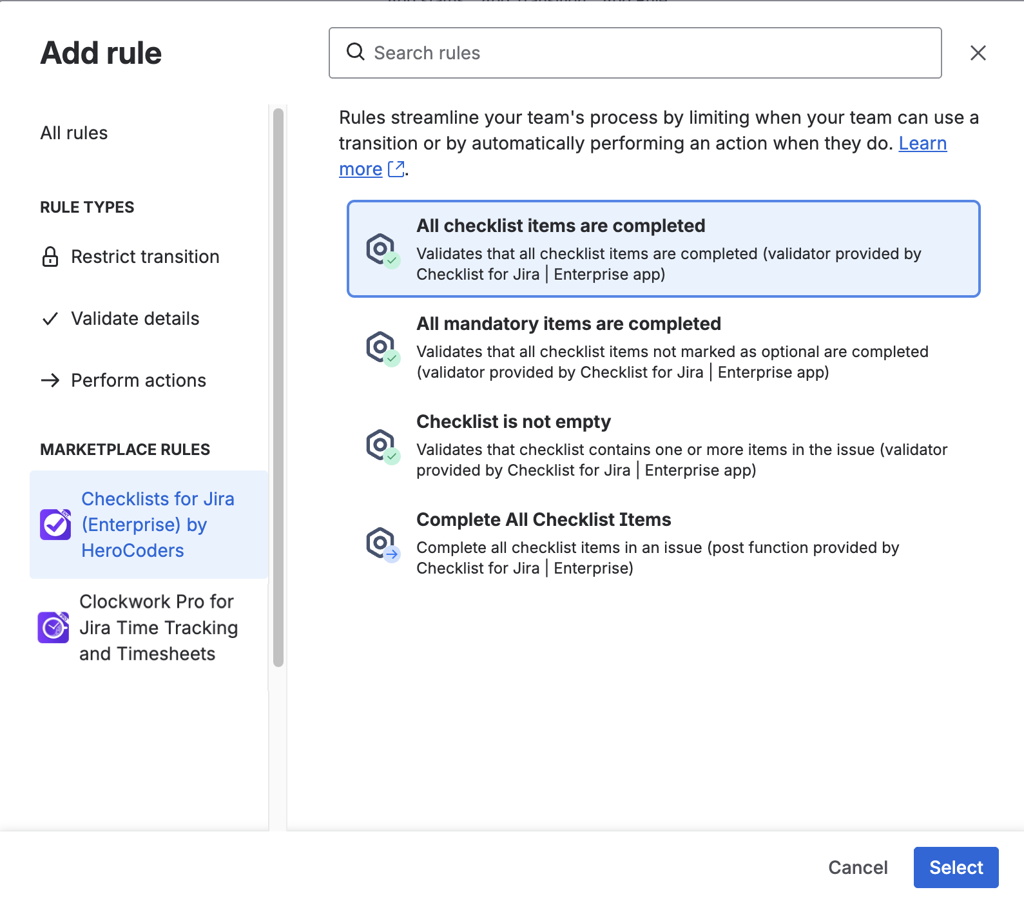
3. Click on Checklists for Jira under Marketplace Rules and select All checklists items are completed.
4. Click Select.
5. Click Add.
6. Click Update workflow to save the changes.
Validating Jira Checklists in Team-managed Spaces
The built-in validator only-works in Company-managed spaces, but you can create a rule in a Team-managed spaces that will prevent the transition from being offered unless all checklists on the work item (including items on both local and Global Checklists) are complete.
To create the rule:
1. Navigate to Sapce settings > Fields. Add the Checklist Completed field to the space.
2. Select Work types and select the appropriate type. Add the Checklist Completed field to the layout and click Save changes.
3. Click Edit workflow.
4. Select the transition where you want to add the rule and click on the Rules + sign.
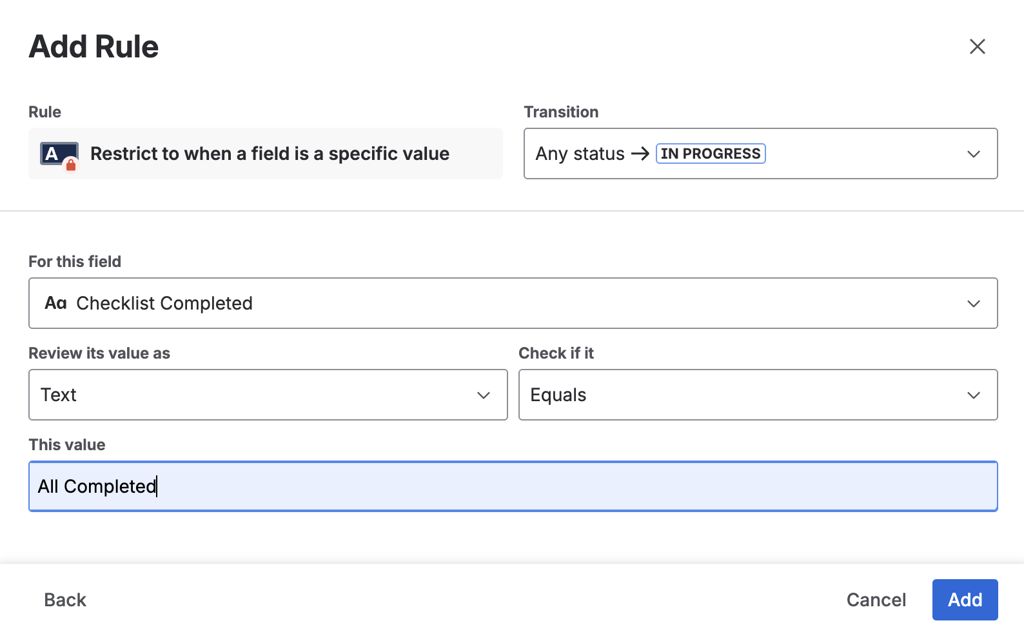
5. Click on Restrict transition and select Restrict to when a field is a specific value. Click Select.
6. Select:
- Checklist Completed for the field
- Review as Text value
- Check if it Equals
- This value All Completed
- Click Add.
- Click Update workflow to save the changes.
That’s it. Now you can rest assured that nothing will get marked as done until all required steps are complete.


