One of Jira’s great strengths is its flexibility – you can literally manage any kind of process. Although an ITSM project may have little in common with an HR project, there are some things that are true across industries and departments: There’s no getting around the old chain of command.
From procurement to hiring to deploying new code – many processes require approval from one or more members of your organization. Requiring approvals improves transparency and accountability, but you also want to ensure that your approval process doesn’t become a bottleneck.
How Do Approvals Work in Jira?
There are multiple ways to build approvals into your processes in Jira. This article will explore:
- Jira approval workflow examples
- Using the built-in approval process in Jira Service Management
- Creating a custom Jira approval workflow for non-JSM projects
- Using checklists on Jira work items to indicate approval
- Using Jira workflow behaviors (conditions and validators) to enforce your approval systems
How to Build a Jira Approval Workflow
Jira Approval Workflow Example
In Jira, approvals are built into the workflow. When a work item is “approved” it can advance to the next status. If the item is not approved, it will be sent to a different status, such as CLOSED or CANCELED.
(See this article for more information about Jira statuses.)
A given Jira workflow can include multiple levels of approval as in the change management example below.

- In the first level of approval the Change Manager can:
- Reject the change by transitioning the work item to CANCELED.
- Approve a Standard Change by sending it straight to the AWAITING IMPLEMENTATION status.
- Transition the work item to PLANNING so it can be prepared for further levels of approval.
- Once planning is complete, the work item advances to AWAITING CAB APPROVAL. The CAB can:
- Reject the change by transitioning the work item to CANCELED.
- Request more information or alterations by transitioning the work item back to PLANNING.
- Approve the change by transitioning it to AWAITING IMPLEMENTATION.
- For Major Changes, the work item is sent for another approval (AWAITING MAJOR CHANGE APPROVAL).
- Work items sent to the AWAITING MAJOR CHANGE APPROVAL status can be:
- Rejected (CANCELED).
- Sent back to PLANNING for modifications.
- Approved (transitioned to AWAITING IMPLEMENTATION).
Thus, the same Jira workflow accommodates work items requiring one, two or three levels of approvals.
How to Create Jira Service Management Approvals
One of the most common places where approvals are used in Jira is in JSM. All sorts of request types – changes, procurement, hiring, equipment replacement – require approvals. Conveniently, Jira Service Management includes some built-in features for creating approval workflows.
Building approvals into Jira workflows entails two basic steps: 1) Defining an approver field 2) Adding one or more approval statuses to the workflow.
JSM includes a built-in multiple group picker field where you can define (per Request type) who is able to approve a request.

When you click on a status in the Jira workflow, you’ll see the option to add/edit an approval step.

Checking the Include approval step box opens a dialog where you can define which field the approvers will be drawn from (typically the previously mentioned Approver field), and how many approvers are required at that stage.

These features make it easy to add approvals to JSM workflows, but you can also add approvals to custom workflows in software and business projects.
How to Build a Custom Jira Approval Workflow
To create an approval in a non-JSM project, you’ll want to:
1. Create a waiting-for-approval status that has at least two outgoing transitions; One where the work item will go if approved and one where it will go if it’s rejected

2. Next, to control who can approve the work item, add a workflow User in group condition to each of the AWAITING APPROVAL’s outgoing transitions.

Using Checklists for Jira Approvals
Creating a Jira approval workflow is an effective method for ensuring compliance with required protocols. However, it can result in complex workflows and requires significant set-up time from your Jira administrator.
Using a checklist is a simple alternative that allows you to request, obtain and track multiple approvals on a Jira work item without altering your workflow or requiring Jira admin configurations. It’s one of many ways checklists can help you manage compliance in Jira.
How to Create a Jira Approval Checklist
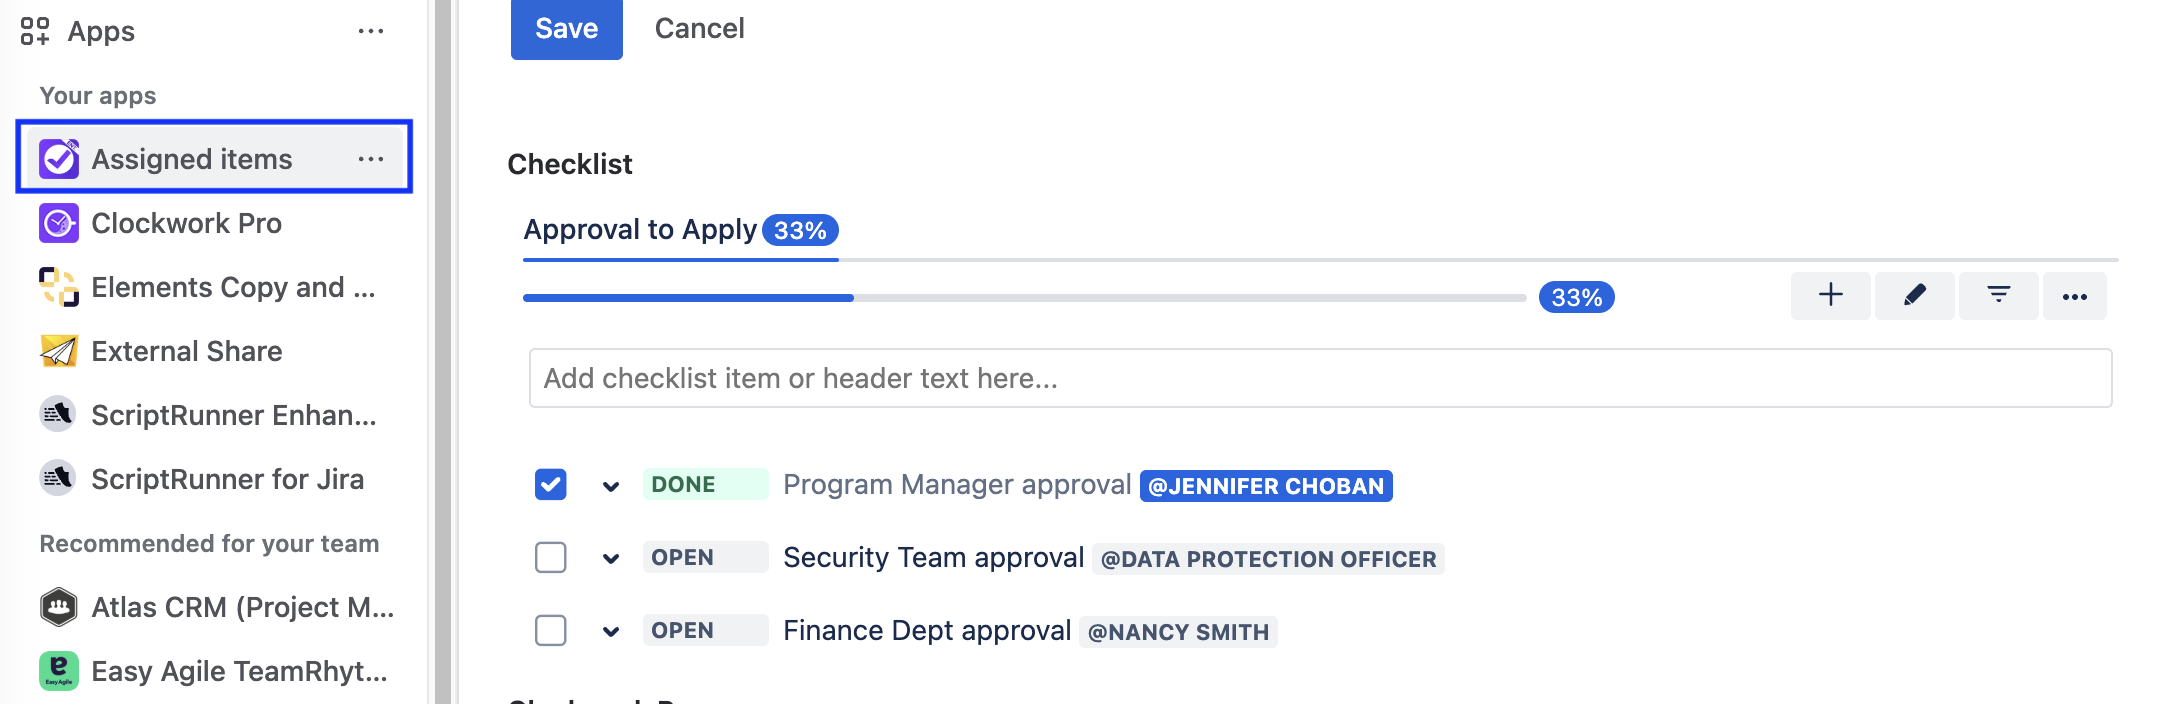
Creating an approval checklist is simple – just use @mentions to list the users who need to approve the work item. You may also want to list the specific compliance area their approval covers. The mentioned user simply checks the box to indicate their approval.

Approvers on checklists will receive a notification that they’ve been mentioned on a Checklist item, and can easily view all of their assigned checklist items from the Apps menu.
How to Validate a Jira Approval Checklist
If you want to ensure that no work item slips through the cracks without the required approvals, you can use the built-in workflow validator to ensure that all checklist items (or all mandatory checklist items) are completed before the Jira work item is transitioned.

But wait –, couldn’t someone else, who is not the approver/mentioned user check the box? Well, yes they could, but checklist records a history of all changes so you can easily track who toggled the checklist item.

Setting up approvals in Jira enhances control over business processes. Whether you use Jira Service Management’s native approval steps, configure a custom workflow, or add a checklist of approvers to a Jira work item – you can enhance compliance and tailor your approval process to fit any organizational requirements.


