Jira includes several project templates for marketing teams – from events planning to email campaigns. But why would a marketing team choose to use Jira, a tool originally designed for software development?
There are many advantages of moving processes into Jira. You hired your marketing team were hired for their creativity, but they spend a big chunk of their time doing administrative busy work. Moving repeated processes into Jira standardizes and streamlines tasks like responding to sponsorship requests and managing logo licensing, allowing your professional marketers more time to use the talent you hired them for. Jira also makes their work more visible while it’s in progress, and more measurable when it’s complete. Managers can see all the work their teams do and allocate resources accordingly.
This use case shows how a marketing team using Jira can implement checklists and automation to keep their workflows simple while ensuring that all tasks get completed for every type of marketing asset.
Issue Types
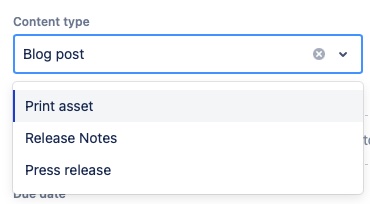
The Jira Content Management template creates an Asset issue type that includes a Content type text field. Replacing this text field with a Content-type dropdown field will allow it to be more easily used with automation (for example, to add a checklist appropriate to the content type).
Workflows
Jira’s infinite flexibility means you have lots of options for your workflow. Here are a couple of examples from Atlassian.
This one is from an Atlassian blog post entitled Marketing project management with Jira Core, designed for managing the publication of blog posts:
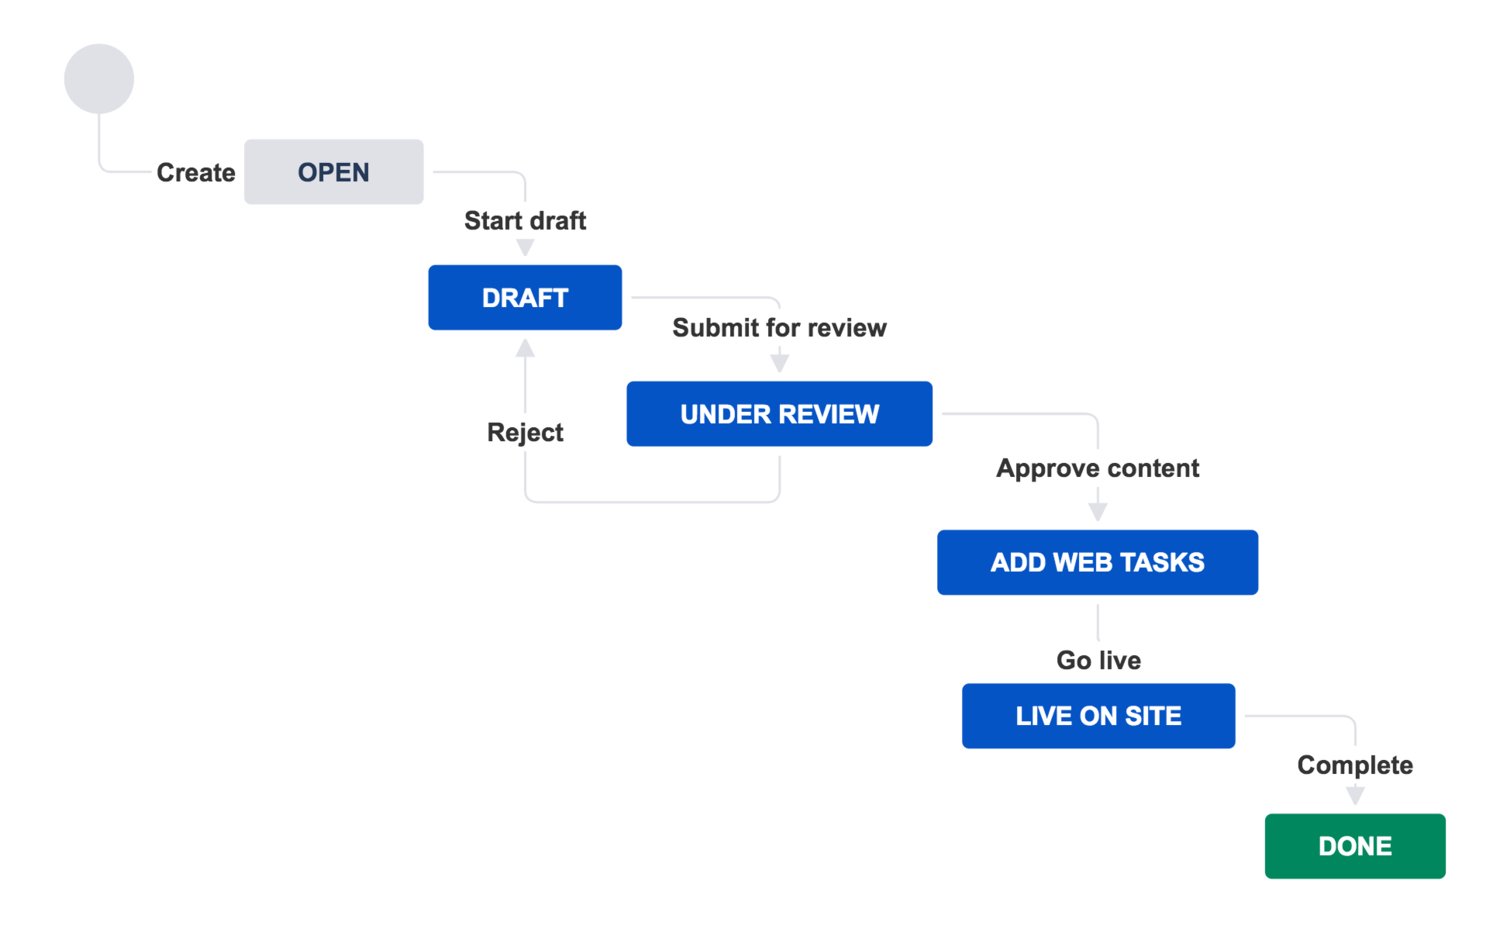
The workflow includes a DRAFT – REVIEW loop, allowing the content to be revised as many times as needed before it’s approved. It also acknowledges that finalizing the content is not the end of the road. It still needs to be optimized for keywords, loaded and scheduled on your website, and analyzed for performance.
Here’s a simpler workflow – the one that’s included in the Content Management template.
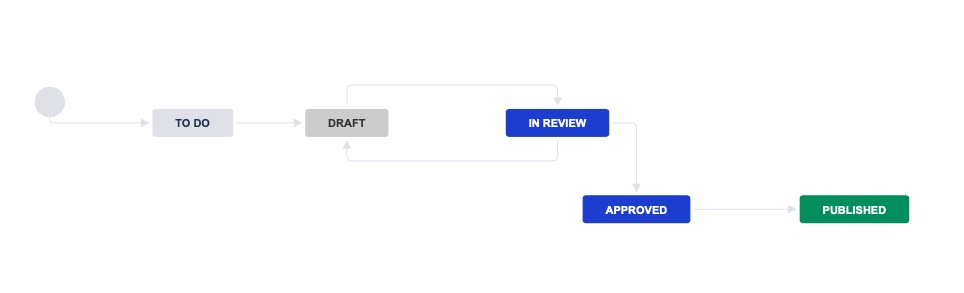
This more streamlined workflow doesn’t include separate statuses for web tasks and going live. However, we can still ensure that those tasks get completed by including a checklist. Indeed, one of the advantages of using checklists is that you can simplify your workflows while still ensuring everything gets done.
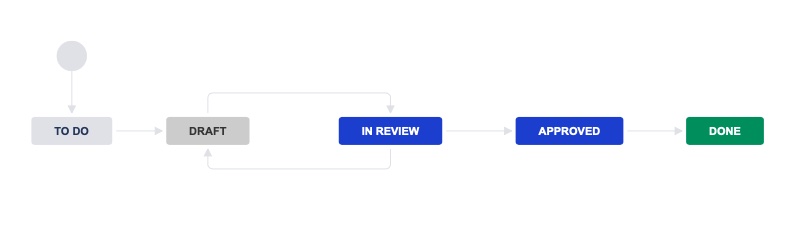
If you’re using a Company-managed project, you may want to change the final status from PUBLISHED to a more generic DONE. This will make the workflow appropriate for additional process beyond content creation. For instance, a legal team could use the workflow for drawing up contracts, and HR could use it for implementing new policies. Sharing Jira assets such as workflows is a good way to simplify administration and keep you instance from getting bloated.
Finally, you might want to add a Workflow Condition restricting who can transition issues from the IN REVIEW status to ensure only the right people can approve the issues.
Checklist Templates
Creating a checklist template for each option in the Content type dropdown will ensure that all of the needed steps are carried out.
Tip: If you’re already using Checklist for Jira, you can copy and paste the items listed in step 5 into a checklist.
To create a checklist template:
- Install Checklist for Jira | Pro.
- Select Checklist from the left nav bar.
- Click Create template.
- Name the template (WebContent). Note that omitting spaces in the template name will allow it to be added to issues via the Jira labels field.
- Add the required tasks to the checklist:
- At least 1 keyword in title tag
- Title tag 10-60 characters
- At least 1 keyword in description
- Description tag < 200 characters
- Fewer than 10 keywords in keyword tag
- Individual keyword density < 6%
- All images have alt tags describing image
- Links open to new tab
- Loaded and scheduled on site
- Click Save.
- Repeat steps 3-6 for each option in the Content-type dropdown, creating an appropriate checklist for each.
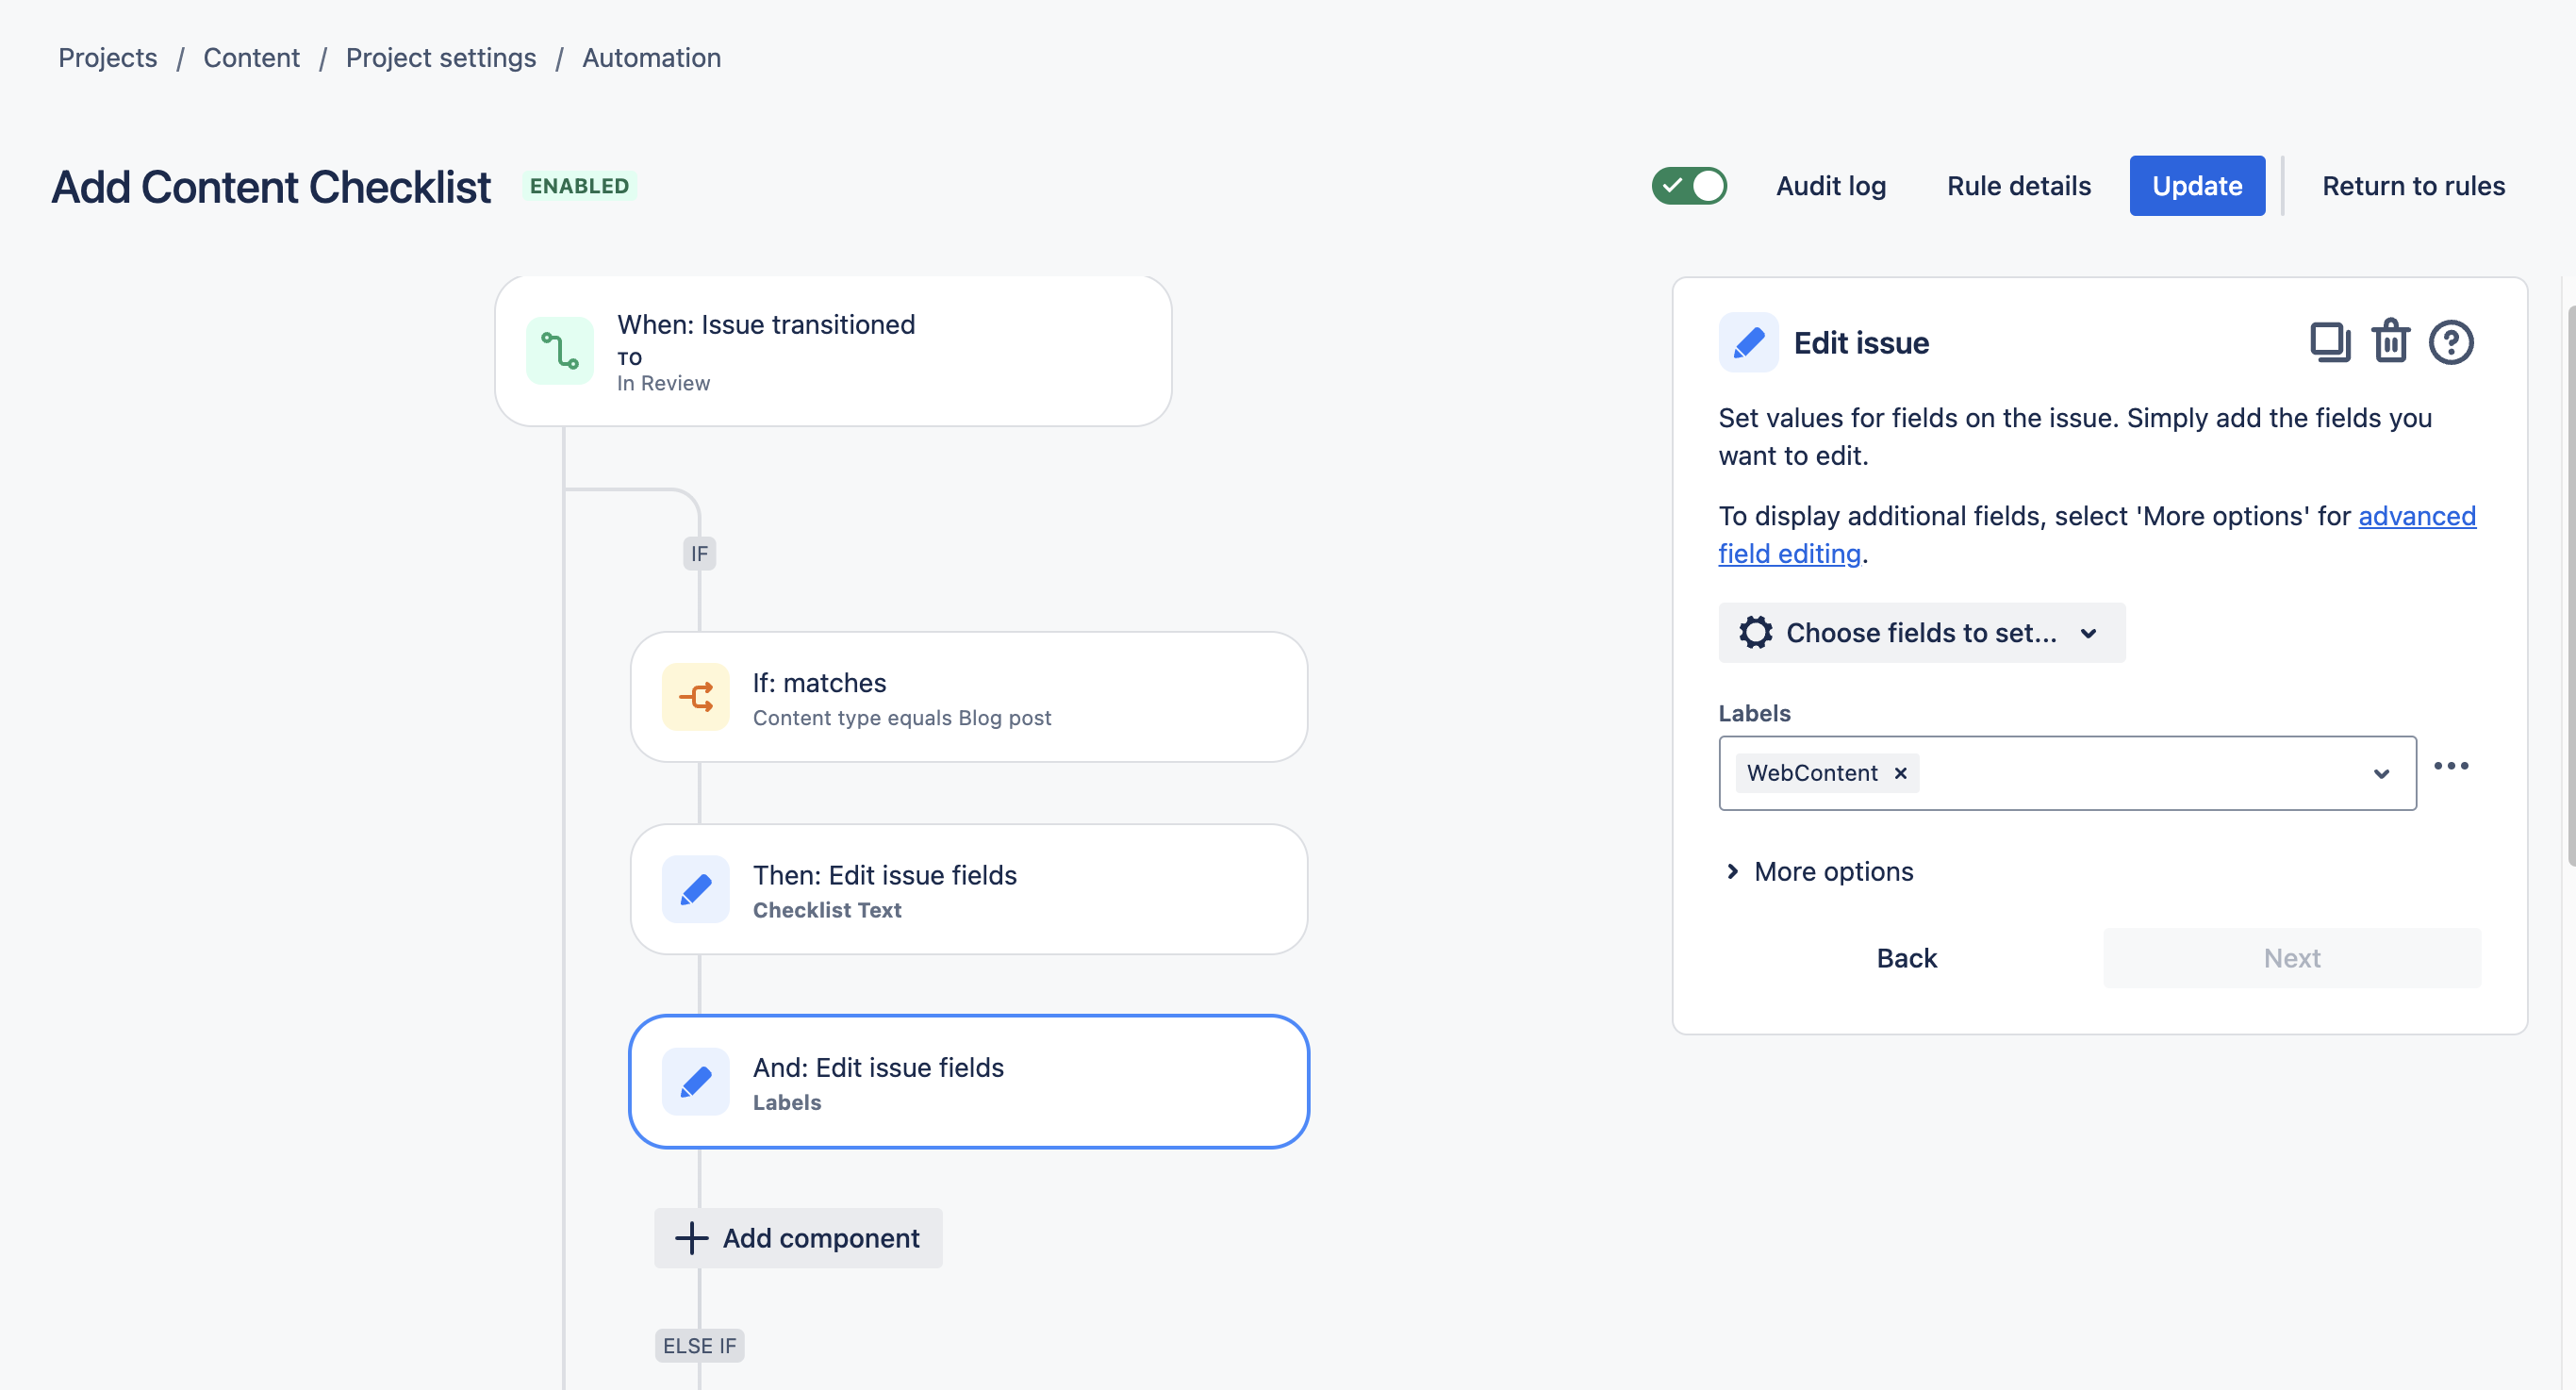
Automation Rule
- Ensure the Save local items to Jira custom fields and Apply checklist templates from issue labels settings are enabled.
- Navigate to Project Settings > Automation (or Jira Settings > System > Automation rules).
- Click Create rule.
- Select the Issue transitioned trigger.
- Leave the From status empty and select IN REVIEW as the To status.
- Click Save.
- Click New condition and select If / else block.
- Click Add conditions and select Issue fields condition.
- Select Content type as the field, equals as the condition and Blog post as the value.
- Click Add component and select Add action.
- Select Edit issue.
- Select Checklist Text as the field to be updated. Leave the text field empty and click Next. This will clear any previous checklists.
- Click Add component and select Add action.
- Select Edit issue.
- Select Labels as the field to be updated and WebContent as the label. Click Next.
- Copy the if block and change the Content type and Checklist template for each option in the Content type dropdown.
- Name the rule.
- Click Turn rule on.
Issue Lifecycle
- A new issue is raised for the creation of a new marketing asset (blog post).
- The issue is transitioned to the DRAFT status and assigned to member of the marketing team who begins drafting the post.
- When the draft is complete, the assignee transitions the issue to the IN REVIEW status and assigns the issue to their supervisor.
- Since the blog post is web content, the SEO checklist is automatically added to the issue.
- The supervisor reviews the post for content and SEO. Seeing that the post meets all of the criteria, the supervisor approves the post.
- Once the post has been approved, the marketing team loads and schedules the blog on the company website, and transitions the issue to DONE.


